Materials used:
- Empty Pro® cores 1” I.D. and 3” I.D.
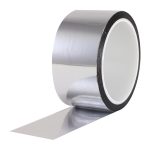
- Pro® Sheen, Red, Green, Gold
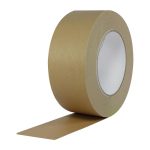
- Pro® 183 Kraft
- Pro® Gaff ¼” White
- Pro® Duct ¼” Green, 1” Red
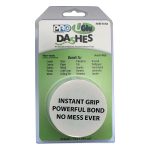
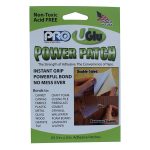
- UGlu® Dashes, UGlu® Power Patch
- Laminating sheets (Transparent film)
- Yarn
- Faux snow
- Figurines
- Decorative foam shapes
- Rhinestones
- Holiday cheer!

Hey Crafters,
Oh the weather outside is frightful
So let’s get to crafting as soon as possible
And since we’ve got no place to go
Let’s craft, let’s craft, let’s craft
Can you imagine a holiday season WITHOUT your HOT GLUE?!? Well start imagining it NOW! UGlu® can fulfill all your holiday crafting needs.
Whether you already have a family tradition of ornament making, or are looking to start one, you’ve come to the right place. The past few weeks I’ve been working on a bunch of different types of fun, personal, DIY ornaments I can show you guys how to make, that are easy enough to do alone or with the whole family. It’s fun, simple, and you can upcycle items you already have. So throw some marshmallows on that hot chocolate and crank up your favorite holiday tunes or movies, because it’s time to spruce up that tree with some personalized, handmade ornaments!
After wrapping countless amounts of gifts, I’m sure you have a ton of empty tape rolls, or as we like to call them, cores. Cores are the basis of almost all of the ornaments I am going to show you today.
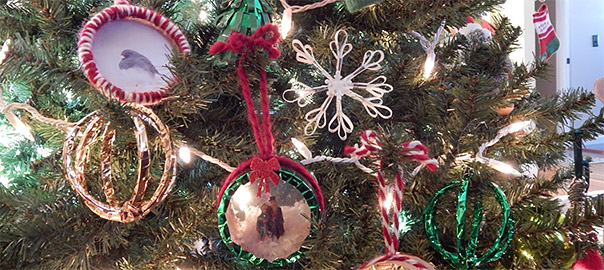
Snow Globes

Snow Globes: I turned an empty 3” I.D. Pro Tape® core into a super cute snow globe using a piece of transparent film (laminating sheet) to close off the front. First I grabbed some Pro® Sheen to frame the brim of the empty core, leaving a little overhang. This way as I folded down the edges inside the core, it sealed the transparent film shut and left a fancy edge. BUT FIRST, before you seal up that back, you have to decorate the inside! Lay down some UGlu® Power Patches and add some 3D decorations. I added a little figurine by rolling up a UGlu® Dash, so it better conformed to the contours of the rounded base. It doesn’t have to be perfect because the faux snow will just cover the excess. Now, add a few scoops of faux snow and seal up the back. For the back you can either use decorative pieces of scrapbook paper, recycled Christmas cards, or even another piece of transparent film if you want to be able to see through the entire thing, it’s up to you. Now repeat the same technique as the front to close up the back. Don’t forget you can decorate the inside of the core too. You can use some of our decorative tapes, or some yarn, or simply just draw on it with some markers or paint. For this particular one, I just used some Pro® 183 Kraft tape and tied some yarn around to hang.
Picture frame

Picture frame: If you don’t have the materials to execute a full on snow globe ornament, here is another easy, modified way to get some fun, personalized ornaments that look just as nice as the slow globes. Decorate some larger cores that will best fit your favorite photos. This creates a festive frame, in which you can insert any photo into the center using UGlu®, or other multi-functional Pro Tapes® products. Then just wrap yarn, ribbon, or your material of choice around the core, tie it in a loop on top and hang! Simple and oh-so personal!
Cute and cozy winter hats

Cute and cozy winter hats: This one is super simple! Wrap your favorite color yarns around an empty core, preferably a 1” I.D. core size. You’ll just need to cut yourself a handful of yarn into about 10inch strips or so, fold them in half and loop them around the entire core until it’s fully covered. Gather the excess that is hanging off and bring to a point (aka the top of the hat) and tie a bow to secure in place. Trim the excess off the top for a clean, pom-pom look. You can also add embellishments like I did. I added a little foam bow with a UGlu® Dash.
Christmas Tree

Christmas Tree: These were a little more time consuming, yet just as easy and fun to make. Cut or hand rip a bunch of strips from the ¼” width green Pro® Duct Tape, making them all around the same length; approximately 4 inches long. Now using 1’’ green Pro® Duct tape, cover a tiny espresso sized disposable cup and begin attaching the pre-cut strips. Bend the strip in half and attach as a loop. Leave some over hang on the end and use this to stick directly to the cup. Start from the bottom and work your way up, to give it a layered look. I used green Pro® Sheen in between each layer to add some extra pizazz and dimension. Now decorate your tree however you please. I used some UGlu® Dashes to attach some rhinestones to the top!
Galaxy saucers

Galaxy saucers: These eye catching ornaments may be super simple to make, but they do pack a big punch on the tree. All you need to do to execute these beauties is wrap 3-1/4” Pro® cores with your favorite color Pro® Sheen and stick inside one another and affix with a few UGlu® Dashes. It’s that simple. Here I used one color per ornament but if you want to get fancy with it, wrap each core in a different color, and when combined you have a beautiful combination of colors! Pro® sheen comes in 6 vibrant colors, red, green, blue, silver, gold and black.
Snowflake

Snowflake: Following the same method as above for the tree, I hand ripped strips of ¼” white Pro® Gaff tape. I married two pieces together. Then I took 3 married strips, bent them each over individually, creating a loop and combined them together like a tiny bouquet, then I secured them together by wrapping a piece of silver Pro® Sheen around the stem of the “bouquet”.

After making 8 or 9 of these I trimmed them all to be the same length. I then attached the stem of each individual “bouquet” together by using a rolled up ball of UGlu®. The ball being the center and the bouquets attaching to that. Then to disguise the UGlu® ball, I added a foam snowflake to the center with a UGlu® Dash.

Which one of these ornaments is your favorite? Let us know by commenting below!
If you enjoyed what you saw today, share this post with your friends! All you need to do is click one of the share buttons on the left hand side!