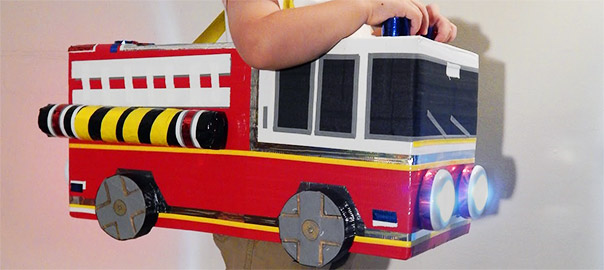
Are you looking for an inexpensive way to get you or your children’s costumes to stand out this Halloween? Here at Crafters Corner that is our specialty. We take the ordinary and turn it into EXTRAORDINARY! Continue reading to see how I turned an ORDINARY box into this extraordinary, ONE OF A KIND costume!!

What Did I Use?
- One empty diaper box
- Pro® Duct 120 colors: Red, Black, White, Yellow
- Pro® Gaff colors: White, Grey, Black
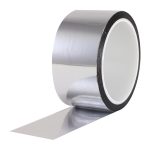
- Pro® Sheen colors: Silver, Blue, Red
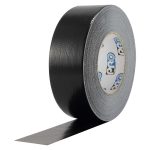
- Pro® Rollerwrap Black
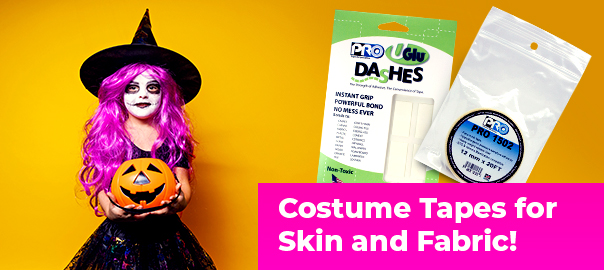
- UGlu® Dashes Sheets
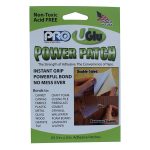
- UGlu® 300 Power Patch 3″ x 3″
- Pro Tapes® cores in 2 different sizes: 1” I.D. and 3” I.D.
- One empty roll of paper towel (just the paper core)
- Battery powered push lights
- Markers
Why did I choose Pro® Duct 120?
First, I like Pro® Duct 120’s glossy and vibrant look. It is just right for the look of this project; a bright shiny cherry red fire truck!
Second, Pro® Duct 120 is amazingly durable and strong, it is thick and stiff- it will add an element of support all around the otherwise flimsy cardboard box and it is also waterproof (in case it rains)! I know my 2-1/2 year old will be in and out of this fun wearable truck many times and “drive” it into things, so making this as durable as possible is key. I was able to use various width sizes of Pro® Duct 120 too, I love that it comes in so many sizes. Due to the fact that I was able to add all sorts of accents to the truck all around and that really made it stand out!
Third, Pro® Duct 120 is very easy to rip with your hands, so you can work quickly and trust it will rip crisp every time!
How To:
Step 1:
To get started I cut out the bottom of a diaper box and began to wrap it lengthwise in red Pro® Duct 120 tape from top-to-bottom and inside-and-out. I left the flaps on the top side of box to help keep the box’s shape as well as something to anchor the straps to later. As I began to wrap the box, the duct tape really added a more durable finish to my box. Due to the fact that of its bold color and stiffness, Pro® Duct 120 is a great choice for this.

Step 2:
I created the straps, so easy by measuring the length I would need and adding a few more inches to that– so I’d have room to secure the ends down. I just laid out a piece of yellow Pro® Duct 120 with sticky side up and a second of same length with the sticky side down marrying the two sticky sides together. Repeat this process because you will need two straps both of the same length.
How to attach the straps to the box:
With the longer flaps of the top side of the box folded back down inside, I poked 4 small holes with a scissor and then pushed through my straps. I let the back side crisscross for a look of suspenders (we had to try the box on a few times to get the height just right). I then turned the flaps back up, exposing the underside and easily secured them in place with some more Pro® Duct 120; I used the black roll here so you could see better. Pro Tapes®’ Pro® Duct 120 has a tight bond and is super strong so it will hold the straps in place just right. I went back and folded the two longer flaps back inside the box and secured them down with some more red Pro® Duct 120, so it would appear seamless. Having those excess pieces of the straps wedged underneath meant the flaps were not flush anymore, but this is no problem because I used Pro® Duct 120 and it perfectly held them down and in place where I want them.
For the shorter flaps (the front and back of truck) I taped them level in place. They will become part of the roof detail. Just a quick piece of red tape secures them, as well as neatly finishes off the corners of the truck.

Step 3:
I used white and black Pro Gaff® for the window details. Pro Gaff® has a matte (not shiny) finish and has a slight texture to it. I used Pro Gaff® here because I really wanted to give this area a matte finish to make it stand out against all of the shine from the Pro® Duct 120. Pro Gaff® also cuts clean and rips easily, I even trimmed out the black windows with some thin ¼” width of grey Pro Gaff®. It’s the perfect touch!


Step 4:
Let’s get rolling and add some wheels! Sticking to the tape theme, I was able to recycle my one inch Pro® cores here. I used 2 different size widths of grey Pro Gaff® and neatly wrapped the cores in a cross hatch style, which added a small element of detail, as well as function helping keep the covering neat. I made sure to cover the front and back (because I will need a flat surface to lay flush against the box).

Once my wheels were covered I drew on some more details for the hubcaps. I used permanent black and metallic markers for this. Pro Gaff® is easy to write and draw on, so this was a good choice here, allowing me to add a few more details to the wheels. For a truly REALISTIC look I found some Pro® Rollerwrap, it is true black and has a rubber- like feel as well as the perfect texture for these tires! As a substitute, just using Pro® Duct 120 or Pro Gaff® black will do the job!

Attach the tires using UGlu®! The Power Patches are great. UGlu® 300 Power Patch features 20mil rubber based mounting adhesive patch 3″ x 3″. I prefer these size patches of UGlu®. They come pre-cut with an easy to peel backing that is simple to trim if necessary. I pretty much threw out my hot glue gun since I’ve met UGlu®. I can get the job done faster and easier with no mess! I trimmed my UGlu® Power Patch, so it fit to the rounded edge of the tire. Two patches for each tire was all I needed. UGlu® has a very quick bond, it can adhere to any surface and hold a decent weight!


Step 5:
Head and brake lights that work! I found these perfect sized little push lights at a local dollar store and to top off the truck they really do add a WOW factor. My son really got a kick out of this part. I put the batteries in and sealed up the back and applied two UGlu® Power Patches (3”x3”) on each light. And there you go. This will also add a safety element when we go trick or treating. He can literally light the way right as he walks! The truck is lit on the front-and-back, so he will easily stand out. For the brake lights I used my cutting mat and an X-Acto™ knife to cut out a red circle from a piece of red Pro® Duct 120. It clung right to the curved plastic front and it really glows red when you turn it on!

Step 6:
Continuing to the bells and whistles… flashing lights and sirens! I stacked together two 1 inch Pro® cores and wrapped them up with metallic blue and red Pro® Sheen for the absolute perfect shine and reflective look of the signal lights. Pro® Sheen is seamless, I love how I can layer it and not even notice where the layers overlap. I like how it bounces off the light at every angle just like a real signal light. Once they were wrapped, one UGlu® Dash 1/2″ x 5/8″ square was all I needed to place them to the roof of the truck. I also used a lot of silver Pro® Sheen tape to trim the truck because I think it looks just like real chrome. The Pro® Sheen adhered perfectly right on top of the Pro® Duct 120. I did need a scissor or an X-Acto™ knife to trim the Pro® Sheen but it’s thin and very easy to slice.

Step 7:
I added all the last details, such as the ladder and water hose. For the ladder, I used pieces of white Pro Gaff®. The water hose is actually an empty paper towel tube layered in Pro® Duct 120 and Pro® Sheen. I used two UGlu® Power Patches 3” x 3” to adhere the water hose to the side of the fire truck. For an added touch of detail to the front of the fire truck, I used two pieces of ¼” width grey Pro Gaff® for the windshield wipers!